

On Evergreen Highway, just past Sporty’s Beef and Brew and the International Market, the silver tire rims flashing from the front lot of United Tire and Wheels are a beacon of hope. A morning jaunt to the grocery store the day before turned out to be a lot rougher than I thought. Somehow, I had punctured a hole in the passenger-side, rear-wheel tire of my car. I had noticed my tire pressure warning light holding steady as I headed to the store. However, the light was not accompanied by a loud, popping noise and my car was handling just fine. I figured the tire pressure was simply low. The Seattle area has gotten some unusual cold and warm spells, so logically, the tire pressure could be “off.” Not fazed a bit by the menacing exclamation point still holding steady on the dashboard, I gathered my groceries, went home, and parked the car. I resolved to learn about my tires–tomorrow. Tomorrow is now today and I’m learning to check my tire pressure for my blog. However, when I see how LOW my one tire is resting on the garage pavement, I quickly realize I’ll be learning about tire pressure AND changing a flat tire.
Who better to help me with these lessons than my husband Nathan? He gained plenty of experience as a young bachelor, tooling around long stretches of Ohio country roads in the crappy cars he could afford at the time. Of course, the cars would leave him stranded and he’d have to learn basic car repair on the fly. So, checking the tire pressure? No problem. Changing a flat tire? Easy. We roll up our sleeves and get to work.
First, we start with the tire pressure. According to the National Highway Traffic Safety Association (NHTSA), about 11,000 tire-related crashes occur each year. So, it’s important to check the tire pressure. The website for the Tire Industry Association (TIA) also recommends checking the tire pressure once a month. Not only will maintaining the proper tire pressure help you lengthen the life of your tires, but you can also increase your gas mileage. It’s also a good idea to check your tires when they’re “cold”—either first thing in the morning before you drive–or 2-3 hours after you’ve driven the car. According to a 2010 article by Henry Margusity, a senior meteorologist for Accuweather.com, friction can cause the tires to heat up as you drive your car (“Blame the Weather for the Tire Pressure Light Coming On”). So, the pressure inside your tires will increase and you won’t get an accurate tire pressure reading.
To determine how much air to put into my tires, we consult the label on the inside door of the driver’s side of the car, which is typically where the manufacturer places the sticker indicating tire pressure for each tire on the car. Air pressure is measured in psi (pounds per square inch) and a tire pressure gauge can tell you how much pressure is in your tires. Each tire is different. My car tires require between 30 and 32 psi. Over-inflating or under-inflating a tire, according to the Tire Industry Association, can lead to accidents, so it’s important to follow the manufacturer’s instructions.
Each tire is equipped with a valve cap. When removing the valve caps, it’s important to place them somewhere you’ll find them again. I unscrew a cap and place the air pressure gauge over the valve. When I hear the hissing sound, I jump back and drop the gauge. Nate tells me not to worry.
“This is normal,” he says.
When the needle on the gauge stops moving, I can pump air into the tires.
“I’m old school,” Nate explains. “I use a bicycle pump.”
So, Nate and I take turns pumping air into each tire. The extremely low tire needs about 20 psi. Once all of the tires are properly pumped with air, we return the caps to the valves.
As we check the pressure, we both notice that the tread is pretty thin. Both the Tire Industry Association and the NHTSA suggest checking the tread once a month and following the manufacturer’s instructions for alignment and balance. To check the tread on the tires, there are a couple of methods, both outlined by the TIA and the NHTSA. When tread is worn down to 2/32 of an inch, it’s time to replace the tires. They won’t grip the roads properly. One method for checking the tread is examining the “tread indicator.” If the raised area between the tire tread (the tread indicator), is level with the tread, it’s time to replace the tires. Or, a penny test can help determine whether or not you need new tires. With this method, you just place a penny on the tread with Lincoln’s head upside-down and facing you. If you can see the top of Lincoln’s head, you need new tires. Again, both of these methods are explained in more detail on the TIA and NHTSA sites.
“So will the air hold in the one tire that was extremely flat?” I ask Nate.
“The only way to find out is to see if you have a hole in the tire. Let’s take the wheel off!” Nate replies.
We open the trunk of the car to find all of the tools we need to remove the tire:
–a jack
–a lug nut wrench
–a jack handle
Of course, there are many websites and videos that can help you properly remove a tire and place a new one back on. The Department of Motor Vehicles, for instance, has this kind of information on its site. (For some reason, the NHTSA does not.) The owner’s manual for your car will also have instructions. We are using the owner’s manual and I’m trying to take pictures of each step while Nate demonstrates. However, Nate’s rear end somehow always ends up in the picture. Not that he doesn’t have a nice rear end. He just doesn’t want it posted on the Internet with a caption that reads, “Look Who’s Single In Your Area!” He is most definitely NOT single:)
In any case, here’s what we do:
1) We make sure the car is parked on a flat surface, with the engine turned off. The safety brake is also on.
2) We use the lug nut wrench to unscrew each of the five lug nuts from the tire. We begin with the upper right lug nut and continue in a systematic star-like pattern: lower left lug nut, top left lug nut, right lug nut, left lug nut. (We put the tire back on using the same pattern/method as well.)
3) Next, we use the jack handle to raise the jack stand. We turn the handle to the right.
4) We next find the spot under the frame of the car where the jack would fit. This spot is called a “jack access point” and I have to get eye level with the bottom steel frame of the car to check this spot. It’s an etched-out square through which the top square of your jack will fit. (Caution: Never actually crawl under your car while trying to lift it with a jack. It’s important to exercise extreme caution when working with a jack, because the car could fall and crush you while you’re working.)
5) Now, we can use the jack handle to crank the jack higher and thus lift the car up off the ground. I’m expecting this rise to be quite dramatic and high, but it’s not. The car is just slightly lifted.
6) At this point, we can loosen the lug nuts even further from the tire and thus lift the tire from the frame.
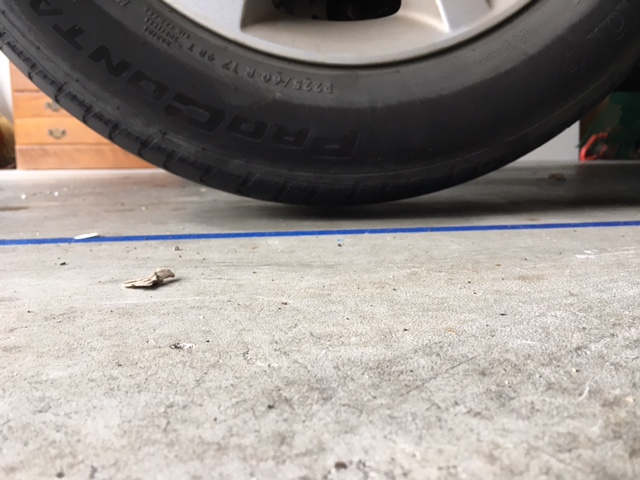
7) After we pull the tire from the frame we can see a definite puncture in the tire. A sharp stone is the culprit.
8) We decide to take the punctured tire to a repair shop.
“It just needs a plug,” Nate explains.
“Is this something I could learn to do myself? Do we buy tire repair stuff and DIY it?”
“Oh, no!” Nate laughs. “No. No. No—I mean, we could, but it’s just easier to take it to a professional. It’s about a $10 job. I think we’ve had enough DIY for today.”
On a Sunday, around noon, not too many tire shops are open, but United Tire and Wheels on Evergreen Highway is! Just as Nate parks his car and opens the trunk to get my tire, Troy springs into action and rescues our tire. We don’t even have to go into the waiting room or explain ourselves. He just knows what to do. He checks out the tire and does a “bubble test” in a bucket of water to see where the puncture actually is. As the bubbles surface, he can pinpoint the spot. Then, he uses a tire plug gun and a sticky, rubbery substance to plug the tire. It takes him all of five or ten minutes. He re-tests the tire in the water. No bubbles. However, he does tell us we probably only have about 2-3 months left with the tread on these tires, but we plan on changing them within 2-3 months—when we get our tax returns back and have done a little more research. So, we’ll definitely come back to Evergreen Highway’s United Tire and Wheels. (Yes, the shameless plug and pun are intended.)
Your Turn at the Wheel: How often do you check your tires? Post your tire stories (or flat tire stories) here.
