
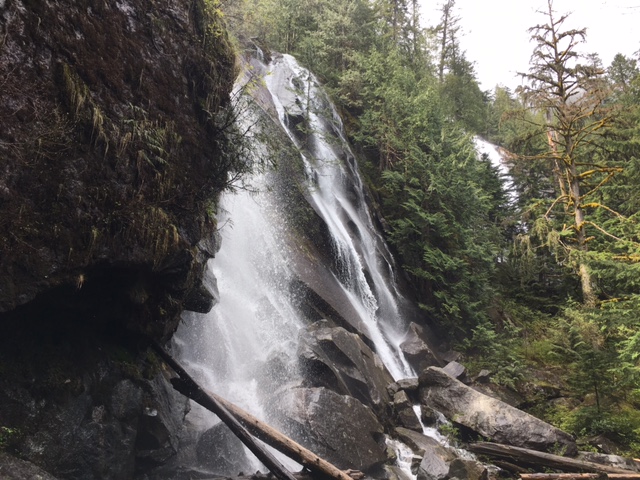

A hike to Bridal Veil Falls in the rain tested the strength of my thighs and bladder. However, I prevailed. I probably should have stopped by the restroom first, after downing a Coke and Gatorade, but I threw caution to the wind and rushing water, which reminded me, at every turn, of my “personal dam” that was about to burst. Luckily, I was working up a sweat and was pleasantly distracted by mossy green trees and leafy things I’ve seen in fancy “outdoors” magazines.
Nate and Alex were with me and I kept up with their pace—which was pretty fast. We passed more than a few groups of people during our 4-mile round-trip hike. Since I’m still working on strengthening my knees, we decided to just go as far as Bridal Veil Falls, instead of trekking further towards Lake Serene. The Falls actually start from Lake Serene and trickle down in a dazzling, lace-like pattern, similar to the veil of a bride. I’d love to see Lake Serene as well—and I know I’d make it up the trail just fine. It’s coming back down that bothers my knees. And, since Nate did not want to have to carry me back to the car, we didn’t take any chances. However, I will be turning up the volume on my squats and lunges, which I’ve been doing faithfully after my cardio during the week. I will make it to Lake Serene and to the top of Wallace Falls (and back down) by the end of the summer. That’s my goal. I’ll be sure to tell you all about it as well. In the meantime, here are some things I’ve learned after hiking with Nate for the past 16 years of our marriage and during the 2-3 years that we dated and were engaged:
1) Wear boots—especially in the state of Washington. Muddy spots and standing water are just easier to negotiate with boots or good hiking shoes. I want to buy some sturdy hiking shoes every time I visit REI, but I’m waiting until my boots wear down first. I own a pair of Boston Accents, which I bought on sale at Sears a few years ago. They held up during Ohio winters and have fared well on a few recent hiking trips. Other than that, I don’t know much else about these boots or if they’re even recommended for hiking. (Probably not.) I figure that once they split apart, I’ll have “earned” a proper pair of hiking shoes. When that time comes, REI luckily has a handy guide for choosing foot wear: https://www.rei.com/learn/expert-advice/hiking-boots.html During my early years hiking with Nate, I got by with just my running shoes. You could too. However, if they get wet, your socks will rub against your feet and make painful blisters.
2) Dress in layers. Hiking can make you work up a sweat. However, when you stop to eat lunch, you might appreciate a jacket or sweater as your body cools down. You might also want an extra pair of socks.

3) Bring food. There’s nothing worse than making poor footing decisions on the trail because you’re too hungry or tired. I’ve taken many a spill that way—much to the delight and amusement of others who are laughing because they haven’t fallen—yet. Refuse to be others’ trail clown! Eat something! I like to bring cereal, sandwiches, water, dried fruit, and fruit bars. Typically, I stuff them in my pockets so that I don’t have to carry a daypack. If you are able to bring a small day- pack that you can hike with—that works too.
4) If you bring food, do you have to worry about bears? Probably. So, you could bring bear-spray with you. Nate and I have hiked through Canada, Michigan, Ohio, and now Washington. We have seen bear scat. We have seen mountain lion footprints. We have seen deer. We have seen moose by the side of the highway, while we were safely cruising by in our car. We have seen giddy German hikers who couldn’t wait to tell us about the bear they saw. However, we have never seen a bear. (One or two may have seen us, though. We think they’re posting pictures of us on the Internet. (See slide show picture number 6 from when Alex was just a baby:
http://www.lebearresort.com/images-amenities.htm
If it looks like we’re posing for that picture–we are. We totally gave our permission and had lots of fun. No bears were harmed during the photo shoot. None that we know of.))
5) If you’re getting tired, don’t push ahead. Instead, save your strength and perhaps try again another day.
6) Do what feels safe for you. On the trail, you’ll see lots of people performing outlandish feats, such as climbing over barriers and marked trails to hang over the sides of cliffs and be “adventure photographers.” It’s absolutely fine to actually stay on the trail and do what’s recommended on the posted signs.
Or, you might see several groups of people make the same decisions about how to cross a slightly flooded (but still safe) area. The decisions that others make though might not be the best path for you to follow. For instance, at Bridal Veil Falls, a kind of “creek” on the trail had formed because of all of the rain that fell over the past few days. Nate, Alex, and I managed to cross through the water by balancing on large rocks that were slightly submerged, but not completely sunken into the water. The toes of our boots might have gotten a little wet, but we weren’t wading through a flood by any means. As we stopped to have our lunch, we noticed other groups of people starting on the edge, balancing on a few larger stones, and then making a leap of faith to a larger boulder that looked slippery and dangerous. The boulder certainly kept them out of the water, but they risked falling and really injuring themselves. Nate, Alex, and I saw that choice as well, but we avoided it. When coming to a spot on the trail that looks somewhat difficult to negotiate, take your time, examine the options around you and choose the one that looks safest for your ability. Don’t just follow along.
7) Try a pair of hiking poles. While at Bridal Veil Falls, I tried out a pair of hiking poles I bought at Eddie Bauer. They were simple to use and they helped me negotiate the “small creek” I mentioned above. When balancing on the rocks, I stuck the poles into the muddy guck below and walked with ease. They also helped relieve some of the pressure on my knees as I went down hill.
8) Plan for emergencies. Tell people where you’re going, so that if you get lost, someone will know to look for you. Bring maps, a compass, a First-Aid kit, and a flashlight. To tell you the truth, we have NEVER done ANY of these things on our hikes, but we should. When Alex was about nine years old, he took a hiking project in 4-H and we learned all kinds of useful information we should be doing, but have never done. To find out more about hiking safety, the American Hiking Society has you covered: https://americanhiking.org/gear-resources/tips-for-your-next-hike/
9) Before hiking, make sure you’re in good, physical shape. For me, a regular, weekly cardio routine of 30 minutes as well as lunges/squats/core work can help me keep my endurance up. I’d like to increase the amount of core and strength training I do in order to protect the muscles around my knees more. Thank goodness Runner’s World magazine has plenty of tips and videos that seem to supplement the exercises I’ve just completed in physical therapy: http://www.runnersworld.com/workouts/6-exercises-that-keep-your-knees-healthy/slide/1
10) Wear sunscreen. Bring bug repellant—or just hike with Nate. Bugs, for some reason, attack him and forget about Alex and me. Though there were no bugs on our hike to Bridal Veil Falls, Nate makes for a great bug shield. I highly recommend taking him with you on every hike. Also, he remembers to bring toilet paper, which is not always available at every park restroom. I usually forget.
Your Turn: What is your favorite hiking tip? Share and discuss!
